Sma 20000TL Bedienungsanleitung
Stöbern Sie online oder laden Sie Bedienungsanleitung nach Ausrüstung Sma 20000TL herunter. SMA 20000TL User Manual Benutzerhandbuch
- Seite / 52
- Inhaltsverzeichnis
- LESEZEICHEN
Bewertet. / 5. Basierend auf Kundenbewertungen
OperatingManual
SUNNYTRIPOWER20000TL/ 25000TL
STP20-25TL-BE-en-12 | Version 1.2
ENGLISH
- OperatingManual 1
- Legal Provisions 2
- Table of Contents 3
- 1.1 Validity 5
- 1.2 Target Group 5
- 1.3 Additional Information 5
- 1.4 Symbols 6
- 1.5 Nomenclature 7
- 2 Safety 8
- 3 Scope of Delivery 10
- 4 Product Description 11
- SMA Solar Technology AG 12
- 4.2 LED Signals 13
- 4.3 Interfaces and Functions 14
- QonDemand 24/7 15
- IntegratedPlantControl 15
- Multifunction Relay 15
- SMAOptiTracGlobalPeak 15
- Surge arrester type II 15
- 5 Mounting 16
- Dimensions for mounting: 17
- 5.2 Mounting the Inverter 18
- 6 Electrical Connection 22
- 6.2.1 View from Below 23
- 6.3 AC Connection 24
- Additional grounding: 26
- 6.4 DC Connection 28
- 6.4.2 Connecting the PV Array 29
- 7 Commissioning 32
- 8 Configuration 36
- System Control Failure 37
- Procedure: 39
- 10 Technical Data 43
- Efficiency 44
- Protective Devices 44
- General Data 45
- Climatic Conditions 46
- Equipment 46
- Data Storage Capacity 47
- 11 Accessories 48
- 12 Contact 49
- 5%6!78% 50
- 9:;*<+%,='3)>+% 50
- SMA Solar Technology 52
Inhaltsverzeichnis
Seite 1 - OperatingManual
OperatingManualSUNNYTRIPOWER20000TL/ 25000TLSTP20-25TL-BE-en-12 | Version 1.2ENGLISH
Seite 2 - Legal Provisions
3 Scope of DeliveryCheck the scope of delivery for completeness and any externally visible damage. Contact yourdistributor if the scope of delivery is
Seite 3 - Table of Contents
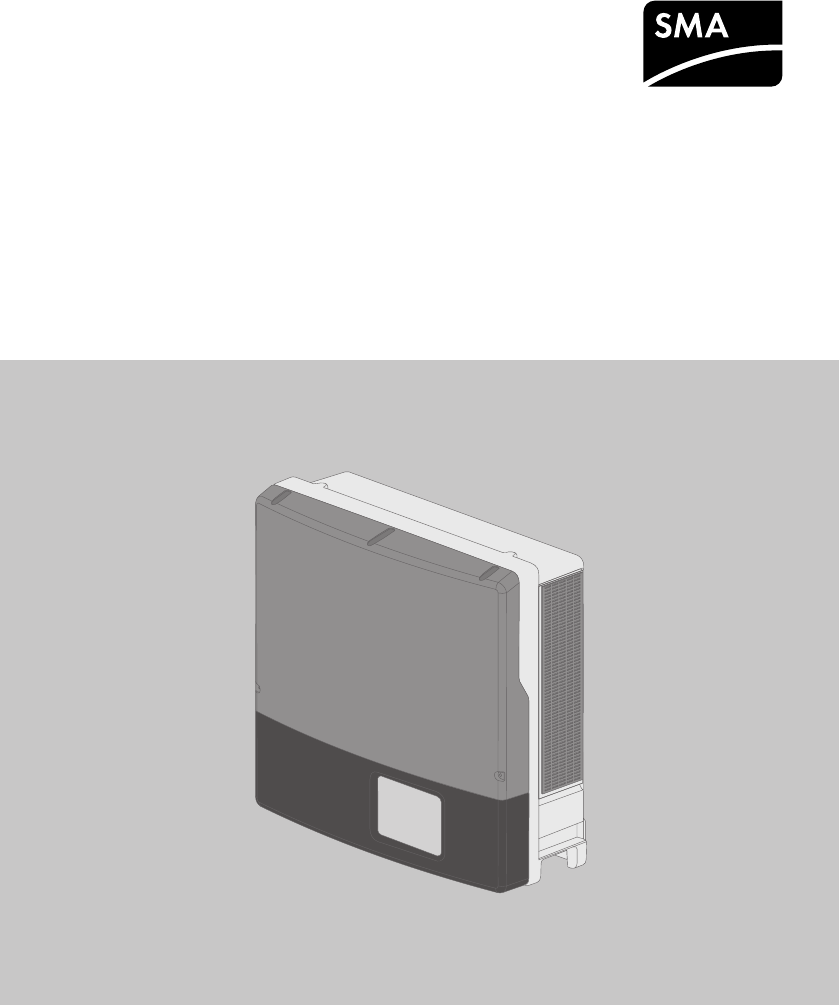
4 Product Description4.1 SunnyTripowerThe SunnyTripower is a transformerless PV inverter with two MPP trackers which converts the directcurrent of t
Seite 4
Position DesignationF DC load-break switchThe inverter is equipped with a DC load-break switch. If the DC load-break switch is set to the position I,
Seite 5 - 1.3 Additional Information
Symbol ExplanationThe product does not have a transformer.Three-phase alternating current with neutral conductorWEEE designationDo not dispose of the
Seite 6 - 1.4 Symbols
LED Status ExplanationRed LED glowing ErrorAn error has occurred. The error must be rectified by aqualified person (for troubleshooting, see the servi
Seite 7 - 1.5 Nomenclature
Multifunction RelayYou can configure the multifunction relay for various operating modes. The multifunction relay isused, for example, to switch fault
Seite 8 - 2 Safety
5 Mounting5.1 Requirements for MountingRequirements for the mounting location:Danger to life due to fire or explosionDespite careful construction, ele
Seite 9
Dimensions for mounting:638 mm432 mm216 mm 216 mm20 mm 11 mm79 mm Ø 11 mm112 mm105 mm110 mm86 mm130 mm 86 mm467 mm619 mm40 mm130 mm648 mm507 mmFigure
Seite 10 - 3 Scope of Delivery
1382 mm2224 mm530 mm50 mm400 mm190 mm315 mm415 mm438 mm415 mm940 mmFigure 4: Recommended clearancesPermitted and prohibited mounting positions:☐ The i
Seite 11 - 4 Product Description
☐ For transporting the inverter with a crane: two eye bolts suitable for the weight of the inverter(size: M10)☐ To secure the inverter from being lift
Seite 12 - SMA Solar Technology AG
Legal ProvisionsThe information contained in these documents is property of SMA Solar Technology AG. Anypublication, whether in whole or in part, requ
Seite 13 - 4.2 LED Signals
2. Align the wall mounting bracket horizontally on the wall and use it to mark the position of thedrill holes. Use at least one hole on the right-hand
Seite 14 - 4.3 Interfaces and Functions
11. In order to secure the inverter from being liftedoff the wall accidentally, attach it to the wall withsuitable mounting material. Use both of thel
Seite 15 - Surge arrester type II
6 Electrical Connection6.1 Safety during Electrical ConnectionDanger to life due to high voltages of the PV arrayWhen exposed to sunlight, the PV arra
Seite 16 - 5 Mounting
6.2 Overview of the Connection Area6.2.1 View from BelowABCD EFGFigure 6: Enclosure openings at the bottom of the inverterPosition DesignationA Pin co
Seite 17 - Dimensions for mounting:
6.2.2 Interior ViewFigure 7: Connection areas in the interior of the inverterPosition DesignationA DC protective coverB Pin connector for connecting t
Seite 18 - 5.2 Mounting the Inverter
☐ Insulation stripping length: 12 mm☐ The cable must be dimensioned in accordance with the local and national directives for thedimensioning of cables
Seite 19
Additional grounding:Safety in accordance with IEC62109The inverter is not equipped with a grounding conductor monitoring device. In order toguarante
Seite 20
4. Insert the cable gland from the outside into theenclosure opening and tighten it from the insidewith the counter nut.5. Route the AC cable into the
Seite 21
6.3.3 Connecting Additional GroundingIf additional grounding or equipotential bonding is required locally, you can connect additionalgrounding to the
Seite 22 - 6 Electrical Connection
☐ All PV modules must be aligned and tilted identically.☐ On the coldest day based on statistical records, the open-circuit voltage of the PV array mu
Seite 23 - 6.2.1 View from Below
Table of Contents1 Information on this Document ... 51.1 Validity...
Seite 24 - 6.3 AC Connection
Procedure:1. Ensure that the circuit breaker is switched off from all three line conductors and that it cannotbe reconnected.2. Ensure that there is n
Seite 25
6.Damage to the inverter due to moisture ingressThe inverter is only properly sealed when all unused DC inputs are closed with DC connectorsand sealin
Seite 26 - Additional grounding:
7 Commissioning7.1 Commissioning ProcedureBefore you can commission the inverter, you must check various settings and make changes ifnecessary. This s
Seite 27
Country data set for operation with external decoupling protectionWhen operating the PV system with external decoupling protection, the inverter has t
Seite 28 - 6.4 DC Connection
Procedure:1. Make sure that the AC cable is routed so that it cannot be damaged by the partition in thelower enclosure lid.2. Insert the lower enclosu
Seite 29 - 6.4.2 Connecting the PV Array
6. Fasten the two screws using an Allen key (AF3)(torque: 2Nm ± 0.2Nm).7. Turn the DC load-break switch to the position I.8. Switch on the circuit
Seite 30
8 Configuration8.1 Configuration ProcedureOnce you have commissioned the inverter, you may have to adjust various settings via the rotaryswitches in t
Seite 31
8.3 Changing Operating ParametersThis section describes the basic procedure for changing operating parameters. Always changeoperating parameters as de
Seite 32 - 7 Commissioning
☐ The total installed PV power must be known.☐ The active power feed-in specified by the grid operator must be known.Procedure:1. Ensure that the firm
Seite 33
Procedure:• Select the parameter Cycle time of the OptiTrac Global Peak algorithm orMPPShdw.CycTms and set the required time interval. The ideal time
Seite 34
7.1 Commissioning Procedure ... 327.2 Configuring the Country Data Set...
Seite 35
9 Disconnecting the Inverter from Voltage SourcesPrior to performing any work on the inverter, always disconnect it from all voltage sources asdescrib
Seite 36 - 8 Configuration
6. Unscrew the two screws on the DC load-breakswitch using an Allen key (AF3).7. Pull the DC load-break switch down and out ofthe recess.8. Remove al
Seite 37 - System Control Failure
11. Release and remove all DC connectors. Insert aslotted screwdriver or an angled screwdriver(blade width 3.5mm) into one of the slide slotsand pull
Seite 38
10 Technical DataDC InputSTP20000TL-30 STP25000TL-30Maximum DC power at cosφ=1 20,440 W 25,550 WMaximum input voltage 1,000V 1,000VMPP voltage
Seite 39 - Procedure:
STP20000TL-30 STP25000TL-30Total harmonic distortion of the outputcurrent with total harmonic distortionof the AC voltage <2%, and ACpower >
Seite 40
General DataWidth x height x depth, with DC load-breakswitch plugged in661mmx682mmx264mmWeight 61kgLength x width x height of the packaging 78
Seite 41
Grid configurations TN-C, TN-S, TN-C-S, TT (when VN_PE < 20V)National standards and approvals,as per 4/2015*AS4777, ANRE30, BDEW2008,C10/11:201
Seite 42
FansWidth x height x depth 60 mm x 60 mm x 25.4 mmNoise emission, typical ≤29 dB(A)Maximum operating altitude 3,000mAir flow rate ≥ 40m³/hTorquesUpp
Seite 43 - 10 Technical Data
11 AccessoriesYou will find the accessories for your product in the following overview. If required, these can beordered from SMA Solar Technology AG
Seite 44 - Protective Devices
12 ContactIf you have technical problems with our products, please contact the SMAServiceLine. We needthe following information in order to provide
Seite 45 - General Data
1 Information on this Document1.1 ValidityThis document is valid for the following device types:• STP20000TL-30 (SunnyTripower20000TL)• STP25000TL
Seite 46 - Equipment
DanmarkDeutschlandÖsterreichSchweizSMA Solar Technology AGNiestetalSMA Online Service Center:www.SMA.de/ServiceSunny Boy, Sunny Mini Central,SunnyTri
Seite 47 - Data Storage Capacity
13 EC Declaration of Conformitywithin the meaning of the EC directives• 2004/108/EG (Electromagnetic compatibility, EMC)• 2006/95/EG (Low voltage dire
Seite 48 - 11 Accessories
SMA Solar Technologywww.SMA-Solar.com
Seite 49 - 12 Contact
Document title and content Document type"Circuit Breaker"Dimensioning and Selection of a Suitable AC Circuit Breakerfor Inverters under PV-S
Seite 50 - 9:;*<+%,='3)>+%
Symbol ExplanationDesired resultA problem that might occur1.5 NomenclatureComplete designation Designation in this documentSunnyTripower Inverter, pr
Seite 51
2 Safety2.1 Intended UseThe SunnyTripower is a transformerless PV inverter with two MPP trackers which converts the directcurrent of the PV array to
Seite 52 - SMA Solar Technology
Danger to life due to high voltages of the PV arrayWhen exposed to sunlight, the PV array generates dangerous DC voltage which is present in theDC con
Weitere Dokumente für Ausrüstung Sma 20000TL

Sma 20000TL Bedienungsanleitung
(52 Seiten)

Sma 20000TL Bedienungsanleitung
(54 Seiten)

Sma 20000TL Bedienungsanleitung
(54 Seiten)

Sma 20000TL Bedienungsanleitung
(54 Seiten)
Verwandte Produkte und Handbücher für Ausrüstung Sma 20000TL
Ausrüstung Sma 20000TL Bedienungsanleitung
 (52 Seiten)
(52 Seiten)
Ausrüstung Sma 20000TL Bedienungsanleitung
 (54 Seiten)
(54 Seiten)
Ausrüstung Sma 20000TL Bedienungsanleitung
 (54 Seiten)
(54 Seiten)
Ausrüstung Sma 20000TL Bedienungsanleitung
 (54 Seiten)
(54 Seiten)
Ausrüstung Sma FLX Series Bedienungsanleitung
 (248 Seiten)
(248 Seiten)

 (36 Seiten)
© 2020, manymanuals.de. Alle Rechte vorbehalten. | 0.041 s |
 Manymanuals.com
 Manymanuals.de
 Manymanuals.fr
 Manymanuals.it
 Manymanuals.pl
 Manymanuals.cz
 Manymanuals.es
 Manymanuals-pt.com
Kommentare zu diesen Handbüchern